Lighting fine art is as important as hanging it. You can put up a picture, but if it’s poorly lit, you can’t make out the detail. Room lighting can work for a lot, but what if you want more of a gallery look, perhaps something to show off something that you bought to bring the room together. So, today we’re talking about how to light your fine art.

Now there’s a lot to understand when it comes to doing gallery quality lighting on your own fine art. You need to understand the fixture, the type of bulb you want to use, and how much light to use. Too little light and you can’t see the art properly. Too much light and you can damage your art. Use the wrong color of white light (yes white light has colors), and your artwork just won’t look right.
Bulb Types
There are about three different types of bulbs which are commercially available: incandescent, CFL, and LED. We’ll discuss each type and its usefulness to light fine art in turn.
CFL

CFLs, or compact fluorescent light bulbs, use a low pressure gas which has an electrical current running through it. They work on EXACTLY the same principle as a neon light or any other glow tube type light. CFLs merely have been curled up on themselves in order to make them compatible with a classic light socket. This is why they possess such a unique shape in the world of light bulbs.
Most CFLs, such as the one depicted to the left, use a mercury vapor gas because it produces a kind of white/blue light. The inside of the bulb is painted with a substance that fluoresces (glows) white when hit with the blueish white light of the gas. This paint gives off a whitish look.
What are their big drawbacks? They don’t produce a full spectrum of light and they have a distinct flicker which some people can notice. CFL bulbs actually create a green cast in the light they give off. The mercury they contain makes them difficult to properly dispose of too. CFL bulbs are a bad choice for illuminating artwork of any kind as it will create a noticeable change in the color and detail you see. I would not choose these kinds of bulbs to light fine art with.
LED

LED bulbs are also problematic as most commercially available options don’t produce a full spectrum of light. The ones that do are hard to find and very expensive.
Instead, most LED bulbs are just very bright blue LED’s with a coating that fluoresces white enough to fool your eye in most instances. These don’t provide a true enough light to illuminate artwork properly. They also produce a lot more ultraviolet light. This is more damaging to your artwork and to your eye.
There is also some evidence that being under LED lighting causes slow subtle permanent eye damage, but I know of no full blown studies to confirm or refute this.
LED bulbs also have to have ventilation or they tend to cut in and out due to overheating. A lot of more traditional lighting fixtures don’t account for this problem.
If you must use a low wattage light, use LED, but be sure to properly ventilate it, get a light that produces a full spectrum and, if you can, either put a UV filter between the lamp and the art or find a bulb that doesn’t produce the UV.
Incandescent
Incandescent bulbs work by running an electrical current through a thin filament of metal which is almost always tungsten. When the filament gets hot, it glows. The exact color depends on how hot it is, starting at red, moving through yellow, white and eventually to blue.

Regular incandescent bulbs like you would use in a light socket simply have a vacuum inside around the filament. This is to protect the filament from reacting with oxygen in the air. Since heat increases the speed of certain chemical reactions, blocking access to the air increases the life of the bulb. This is why a broken bulb may glow for a time but will burn out extremely quickly.
Standard incandescent bulbs do not generally produce enough light, a proper color of light. Nor do they last long enough to properly light your wall art.
Next, we get to halogen, xenon, and krypton bulbs which are also incandescent bulbs. However, these are not as common to find on the market.
When tungsten gets very hot, it starts to vaporize a bit. If the bulb has a vacuum inside, much of the tungsten is deposited on the inside of the glass bulb resulting in the glass blackening and the bulb not producing as much light.
Halogens will bond with the tungsten atoms when they’re hot and release them when they cool. This causes the tungsten atoms to be deposited right back on the filament instead of on the inside of the glass. This keeps the bulb from glass-blackened dimming and makes the bulb last a lot longer.
Xenon and krypton are noble gasses that won’t really react with anything. They will also inhibit the tungsten from depositing on the inside of the glass. Xenon and krypton are pretty much interchangeable as light bulb gasses but you can supposedly get about 15% more lumens per watt (meaning a slightly brighter bulb) with xenon than with krypton. They produce a cooler color of light than a halogen bulb will. Incandescent halogen, xenon, or krypton bulbs are generally best for lighting your art.
Measuring Light
Measuring light can be confusing and difficult. We have terms like lux, lumens, candlepower, candles, footcandles, and when talking about regular light bulbs: watts.
First off, while watts is actually a measurement of how much electricity something uses. For decades, we thought of a 40 watt bulb as a particular brightness and a 60 watt bulb as brighter. Even today, with so many more choices in bulb type, we get 40 watt or 60 watt equivalent on CFL and LED bulbs. While these are useful for most people to conceptualize, when we’re trying to actually see exactly how much of what kind of light is on an item, it isn’t so easy.

For the purposes of this article, we’re going to mostly examine lux and lumens. Lux and lumens are measures of how much light there is. They are not interchangeable however. Lumens measures total light output, while lux is a measurement of how much light is reaching a given area. This means that if you have a bulb of say 100 lumens, and are lighting a 10 square foot piece of art, you get 10 lux on your art. Of course, this assumes a properly focused bulb with no light loss, which is not going to happen.

A professional setting up lighting in a high end gallery would use a specialized light meter. Most people trying to light art in their homes themselves aren’t going have such a light meter and most likely aren’t going to want to spring for one. If you want to get close to the light meter measurement, simply divide the lumens by the square footage that the light is falling on will get you close to the lux number. It’s likely that the number of lux will be slightly lower since some of the light is going to spread where you’re not calculating, and is going to be lost or absorbed by the reflector in the fixture.
For lighting wall art, you generally want about 50-100 lux but be careful not to go above 150 lux particularly for a giclée print (most fine art photography) as brighter light can damage the ink pigments. Paintings can sometimes tolerate somewhat higher lux values.
Color Temperature
Color temperature is a way of expressing what color a particular light source is. It is generally only used for incandescent and other full spectrum lights. Light color is measured in Kelvins, a unit of measure named after William Kelvin. A Kelvin is a measurement of actual physical temperature based on the Celsius scale but 273 degrees lower. In physics, the Kelvin scale starts at absolute zero and moves up. Since physics proved that there is no way to go colder than absolute zero, there is no way to have negative Kelvins.

William Kelvin discovered that heating a carbon block caused it to glow. As it got hotter the color it was glowing changed. Quoting Wikipedia, “The color temperature of a light source is the temperature of an ideal black-body radiator that radiates light of comparable hue to that of the light source.” That only makes sense to people who’ve studied that part of physics. For our purposes, that’s the temperature of the filament in the bulb in Kelvins (assuming that’s how the light is being produced), or fairly close to it. If the color is being produced by something other than a hot piece of wire, then it means the color that something heated to that temperature would produce. Of course this paradoxically means that the “warmer” the color of the light, the lower the number of kelvins, and the cooler the actual bulb temperature.

For lighting your fine art, the jury is still about out on what the proper color temperature is. Some galleries have lighting systems and special bulbs which allow for tuning of the color temperature for optimal results. However, that setup is not something that is going to happen for most residential installations. For general use, a color range around 3000 K seems to be adequate but you may want to experiment and see what works best for you.
Glass
With paintings, photos on canvas or on metal and similar, there generally isn’t glass in front of them. With regular framed photography however, it usually has glass which protects the photograph. Lighting the painting can cause a distraction with the glass as the light reflects off of it. You want account for the angle the light will be hitting the image, and where it will generally be viewed from. If that creates unacceptable glare, low glare glass or anti-reflective glass is available. If the image will be in direct sunlight for part of the day where you hang it, you should also consider options for UV protection.

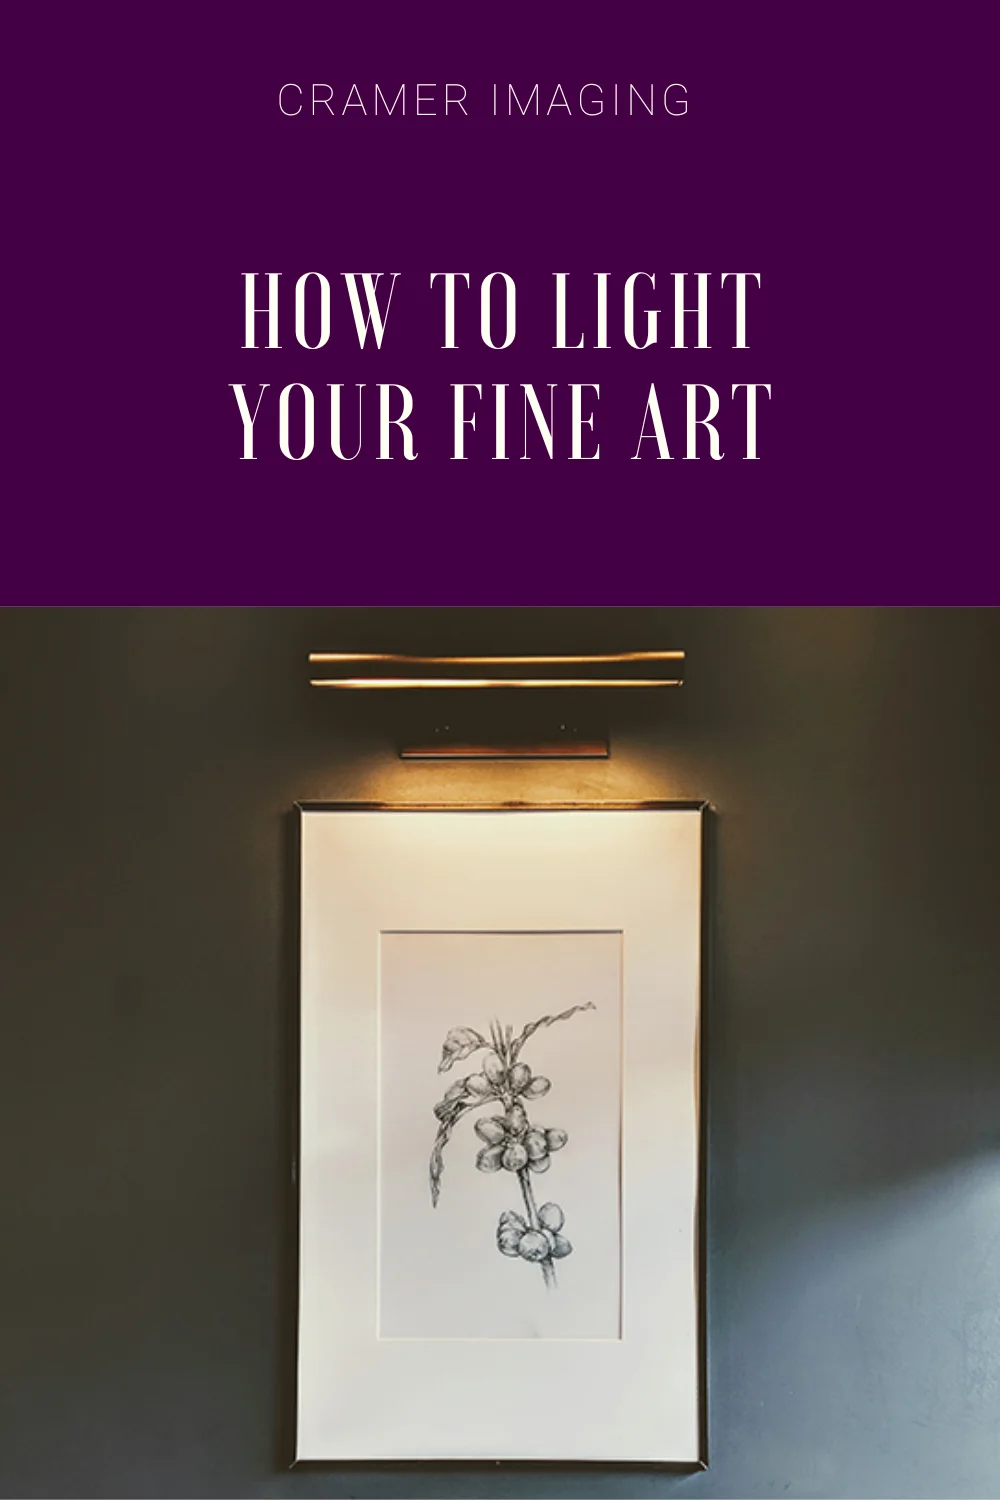
Setting It Up
OK, so now you have a spot picked out and you want to light your artwork. You could just use room lighting, but if you wanted to do that, you wouldn’t have read this far. You might plug a simple lamp in next to the art work, but that doesn’t really light it properly.

Art lamps are available on several sites. They attach to the wall above the frame or to the frame itself. Some some are battery operated, others are just plug in lamps, while others require a wired connection to electricity. Then there are a vast number of styles to match how you want your picture lighted, as well as the rest of the room decor.
Some sit just out from the frame and shine down on the picture. The advantage to these is that they don’t stick out from the wall where someone may be walking. The disadvantage is that since they’re close to the artwork it is not lit all that evenly.
Others have a long arm that stick up and out to give you a better angle on the light to the picture, but they do stick out into the room. Those light fixtures will light fine art but might bring other problems with them. Depending on how and where your art hangs, this arm could stick out into the room inconveniently.
You could also go with more permanent, less obtrusive lighting mounted in the ceiling such as an aimed light or even track lighting as well. These would provide better lighting at a better distance and a better angle, but are far more difficult to install. For most people, they’d require a professional installation job for such lighting options.
Summary

To light your fine art, you should go with a good fixture of some type. If you can a permanent installation that focuses the light properly on the piece, that is your best choice. However, if that’s not an option for you, you’ll find several wonderful fine art lamps available from a number of places online.
If you can, avoid CFL and LED bulbs as they they don’t generally produce a true spectrum and, when they do, they can be very expensive and harder to use due to heat dissipation issues. There can also be some concern with LED bulbs with higher UV output which could damage the artwork.
If glare will be a problem, consider getting anti-glare glass. Add UV protection if direct sunlight is a concern or if you must use something like an LED bulb.
Finally, choose a color temperature that works for your art. Lower temperatures create a “warmer” or more yellow color while higher color temperatures create a cooler or more white or even blue color. While there are some studies on what works best, that research is still ongoing. For now, experts tend to recommend about 3000 K to light fine art.
Conclusion
People often overlook lighting fine art properly. However, you need it to greatly enhance fine art’s aesthetics compared to just hanging it on the wall. Like everything else, you must do it correctly. However, with a little care, properly placed lights can make a good piece of art look great. We hope you learned what you need to so you can properly light your fine art.
Have more advice about properly lighting your fine art? We would love to know. Share it in the comments.


Best Sellers

Cramer Imaging Newsletter

Receive monthly updates in your inbox from us.

