You’ve seen those beautiful photos which have water pouring down in what looks like a silky smooth flow. They’ve become a staple in nature and landscape photography. Ever wonder how to take those kinds of photos yourself? It’s really easy if you know what you’re doing. Today we’re pulling back the curtains on one of the common but beautiful tricks for landscape photography.

Ah, the silky water landscape photo. It’s been popular in photography circles for a long time now. It seems like it would be so difficult to get. However, nothing is further from the truth if you know what you’re doing in photography and have the right tools at your disposal.
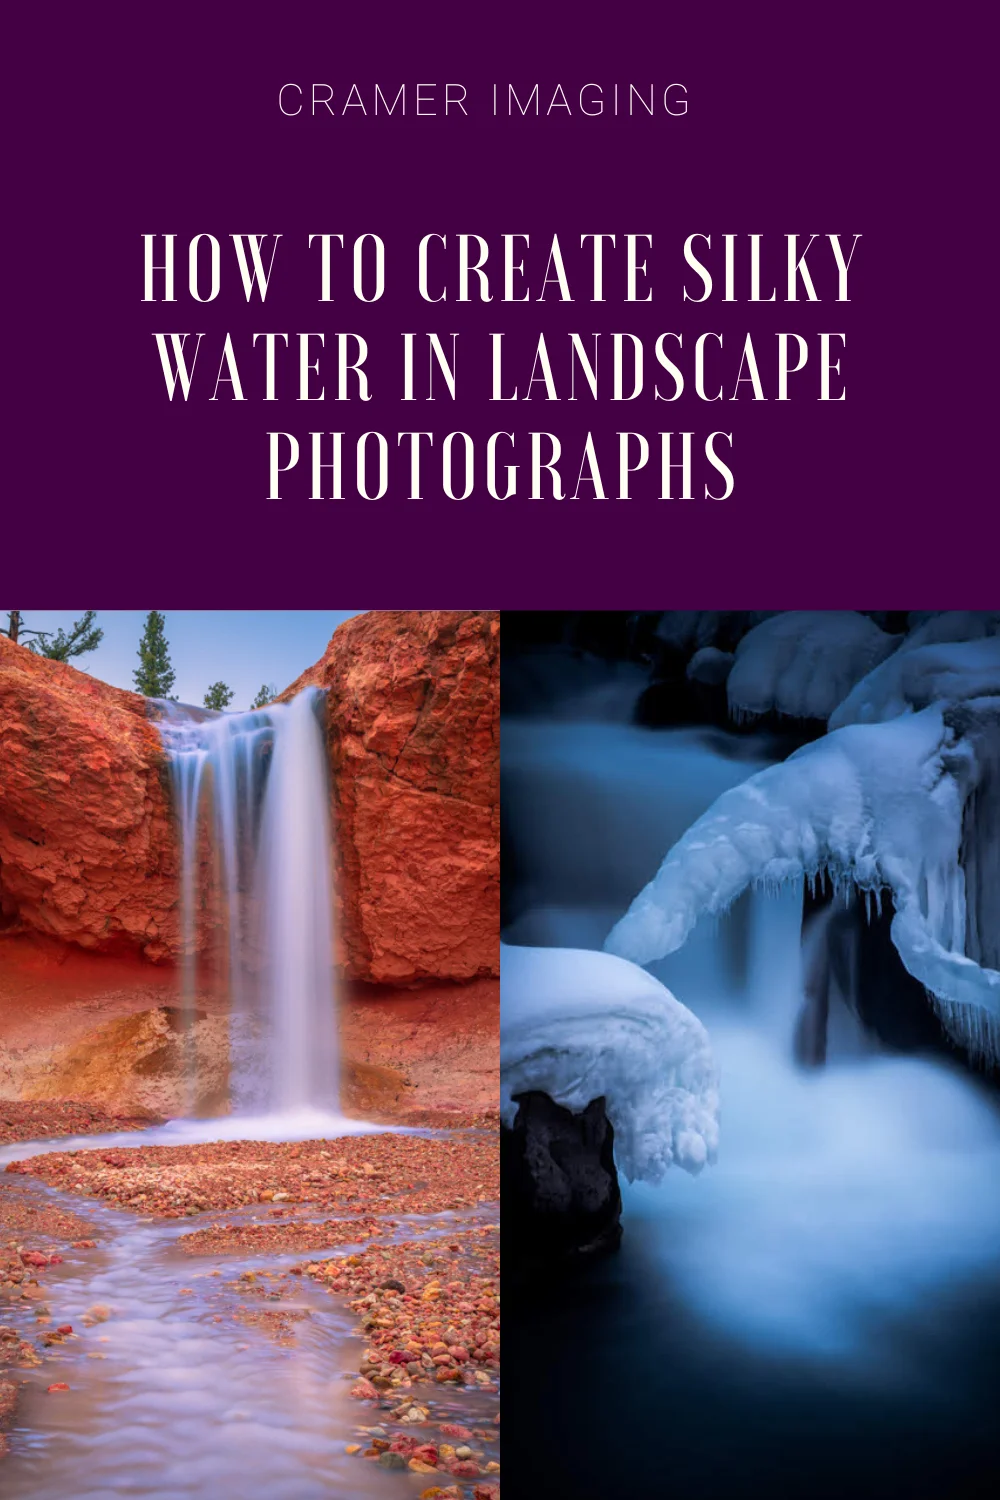
Creating the silky water effect is a bit deceptively simple. The secret is to have the shutter open as long as possible in order to capture the flow of the water instead of its current position. In doing this, you must allow as much water as possible to flow through your field of focus and the little splashes will be ignored over the duration of the long shutter speed.
Here is what you will need equipment-wise and setting-wise for the silky water technique in landscape photos.
Equipment Needed
- Camera and lens of choice (obviously)
- Cable release or remote (cable release is preferred)
- Neutral density (ND) filter(s)
- Tripod

Camera Settings
- ISO: 100 or 200 (depending on your camera’s lowest setting)
- Shutter speed: 10-15 sec minimum
- Aperture: depends on settings but f/8 is a good average for deep depth of field

How to Get the Shot

With this kind of photo, any tiny movement of the camera, in any form, is going to be your enemy. You’ll need the camera to be perfectly still long enough to get the shot if you want a beautiful sharp photo instead of some abstract blur.
- Position your camera and lens of choice on your tripod. Since you’re going to have your shutter open for 10-15 seconds minimum (longer for lower light conditions), there’s no way that you can hold your camera perfectly still for that long.
- Make sure that you’ve plugged in your cable release or have your camera set to accept shutter commands from your remote. How to do so is different for every camera brand so consult your camera manual if you have a question. In a pinch, you can use the shutter timer (often used to let the photographer join group portraits) instead of a remote or cable trigger. However, you will still need to press the shutter button to activate the shutter.
Now onto the second problem. Leaving your shutter open for a long time means a lot of light is going to get to the sensor. Without proper control your photo will be completely blown-out and over-exposed. You have to find a way to dim the light down. That’s what the ND filters are for. They act like sunglasses for your camera lens. They come in several different levels of darkness depending upon your needs (the higher the number, the darker the filter, up to 10).

- Compose your shot. It won’t be so easy to do with the filter on.
- Attach your ND filter to the front of your camera lens. It should just screw on. Then switch your auto/manual focus switch to manual so that the camera won’t try to auto-focus once the filter is put on (hint: it will have a difficult time doing so if it can at all).
- Your final step is to click the shutter.
Some Added Tips and Tricks
Over time and several different attempts, we’ve come across some added tips and tricks which may help you create the silky water landscape scene of your dreams.
No ND Filter

If you don’t have an ND filter, you can still try out this silky water technique if you attempt it later in the evening (say during blue hour). It’s a narrow window of time just before sunrise and after sunset, but it works for silky water photography. I created this blue waterfall image without an ND filter during blue hour.
Keep in mind that the more you stop your aperture down, the longer your shutter speed will need to be for a proper exposure. Most cameras will flip over into bulb mode, with a cable release, if you set your shutter speed over about 30 seconds. Bulb mode lets you control how long you want the shutter open with the shutter button itself.
The closer it gets to full twilight during blue hour, the more you will need to open up your aperture for a proper exposure. If you’re going for a very deep depth of field, this will be problematic. if that’s what you’re going for, but if you’re going for a shallow depth of field, not so much.
This method is ok if you’re just starting out or don’t have the money for a proper ND filter, but if you want to be able to create the effect pretty much anytime, you need neutral density filter.
Turn Off Vibration Reduction

Turn off vibration reduction (VR) on your lens if it has it. While this feature is nice and can help a lot when hand holding, it can blur an image very slightly when the camera is already perfectly steady (say on a tripod).
VR is for countering the slight shake your hand has when hand-holding the camera. It’s not meant for tripod use at all. If you want a tack-sharp photo on a tripod, turn off your VR.
You will need to locate the VR switch on your camera or lens if there is one. Consult your manual if you have questions.
Use a Weight

If you find yourself out shooting a photo in windy conditions (been there, done that), hang a weight under the camera on the tripod can help stabilize it. I generally don’t recommend trying such shots in too much wind because any foliage is going to be moving with the wind and will therefore blur (unless that’s what you want in your shot).
If you find you must shoot in the wind, try to keep things being battered around by the wind out of your shot unless that’s part of the look you’re going for in your photo.
You can buy a dedicated weight or you can improvise in the field with a bag and some rocks.
Use Your Mirror Up or Mirror Lock Setting

If you have a cable release, using the mirror lock setting on your camera, with the shutter release, can help reduce internal vibration blur. When you take a regular shot, the mirror (that lets the viewfinder look through the lens) moves, then the shutter opens exposing the sensor. When the mirror moves, it imparts a bit of shake into the camera while the shutter is open. This adds a tiny bit of blur to your overall photo. Just enough blur to ruin a tack sharp photo.
With the mirror up setting, pressing the shutter release once moves the mirror and locks it in place. The next button press opens the shutter for the photo. This initial motion of locking the mirror eliminates the vibration of said mirror as it’s moving. This tiny little detail can be the difference between a good sharp photo and a tack-sharp photo, especially with long shutter speeds like you need for silky water. Just don’t forget to switch back off the setting for normal photography.
Stacking Images for a Final Product
 Another method I learned about for creating silky water photos involves taking multiple short exposure shots and stacking the shots in your image editing software. If you’re seriously into photography, you might recognize this as a method for creating star trails. It’s true. It works there as well. However, for the silky water effect, you need to apply some different edits to your stack of photos than you will for star trails.
To start with, you will want to take a series of photos with a shutter speed at something like 2 seconds per photo. This should give you enough water motion to eventually blur into the silky feel we’re going for.
Once you’ve opened all your images in your photo editing software as layers in a single file (yes this is important), then you simply edit each layer’s opacity for the final product. The bottom layer will be fully opaque but each layer ascending will have the formula of 1/x for the opacity where x is the layer number in ascending order. You might need a calculator to turn that fraction into a percent if you have more than about 5 layers. I know I need one.
Then you merge all the layers together, either into the base layer or as a single layer over the top of all the rest. You’ve got your silky water composite photo. I used this technique when I created the photo below.

Conclusion
Creating the silky water effect in landscape photos is easy. It creates a beautiful ethereal look when photographing moving water and, under the right conditions, can turn a waterfall into a pillar of smoke. A minimum of equipment is necessary (camera and lens, tripod, cable release or remote, and ND filters) and the camera settings are easily mastered.
If this is a technique you feel you are ready for, I invite you to give it a try. I’d love to see your results. Please share them in the comments section below. Make sure to indicate if you want feedback or not.


Best Sellers

Cramer Imaging Newsletter

Receive monthly updates in your inbox from us.

